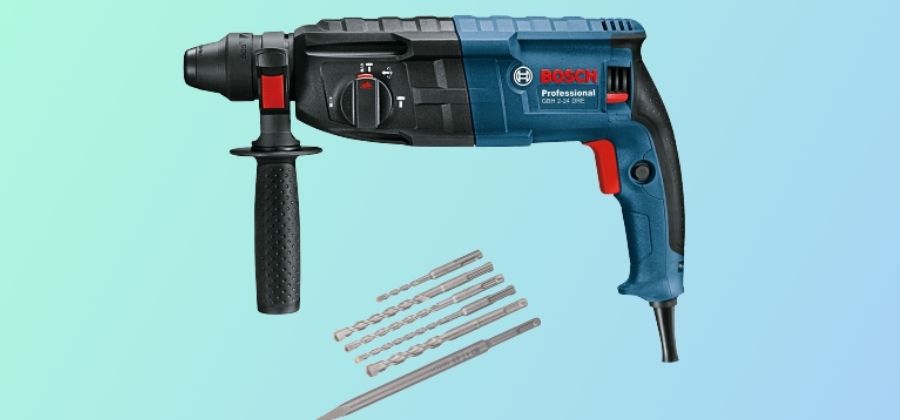
Bosch, in fact, is one of the most reliable Power Tools manufacturers right now worldwide.
However, it does not necessarily mean that whatever it manufacturers will perform up to the expectations for a long time.
In case your Bosch hammering drill is not hammering like expected, then you might have to take a look at some of its solutions.
The easiest fix to Bosch hammering drill not hammering is either to replace its broken piston, roller bearing, or internal cylinder. Bosch already sells replacement parts of its products, so you will find them easily from the local market.
But, does the story end here?
Absolutely not!
We are on a ride to find out the probable causes of the Bosch hammering drill not working up to the expectations and fix it with a step-by-step tutorial.
Stay Tuned and read the whole discussion as follows:
Causes of Bosch Hammering Drill Not Hammering?
To put it simply, “You cannot fix anything if you do not know its cause.”
The same is the case when we take a look at the matter at hand, i.e. the probable causes of the Bosch hammering drill failing to hammer properly. Remember bosch hammer drill won’t hammer if you don’t follow the steps mentioned in the instruction manual, here we have summarized the steps to answer your question about how to fix the bosch hammer drill.
Some of the most probable causes might include:
- A broken or worn-out rubber piston.
- A collapsed or broken roller bearing while hammering.
- Internal cylinder collapse due to uncanny circumstances.
Along with that, most of the time, the issue will also arise due to one’s own sloppy work. That would include;
- Sloppy work with the hammering drill.
- Not being able to use it properly.
- Using the drill when it’s overheated.
- Extra workload while hammering.
- Not taking care of the Bosch hammering drill properly.
- Using the drill without any interruption.
Now, that your bosch drill hammer action not working as desired, you have to follow some of the following steps to repair it properly:
How to Repair Bosch Hammer Drill in 6 Easy Steps?
Before rushing to the solution part, here are some of the things you will need before fixing the drill:
Things You Will Need:
- A screwdriver (For opening the drill and inspecting the piston)
- New piston for your specific model.
- New O-Ring depends upon the drill you use.
- Drill oil (For refilling it after repair)
Have a look at the steps to follow after getting those things:
Step 1: Open the Plastic Case of Drill:
Place all accessories on a working table and start with opening the drill’s case via screwdriver.
Normally a Bosch hammer drill has 6 screws placed at different positions. So, unscrew them one by one and open the case properly.
Follow the next step then:
Step 2: Drain the Existing Oil:
Your Bosch hammer drill uses special oil to make sure that everything works smoothly and does not cause any friction. Therefore, before you start your repair, it is recommended that you remove the oil beforehand.
Now you can do two things in this regard;
▶ One is to drain and collect the existing oil in case you do not have the replacement.
▶ Two is to remove it completely and replace it with new oil.
▶ We will recommend the second option as it will improve the performance of your hammer drill easily.
▶ After removing the oil, the next step involves:
Step 3: Examining and Changing the Piston:
Here comes the interesting part!
If your Bosch hammer drill is not hammering, it’s probably because it has a misfiring or a broken piston.
So, the first step here would be to pop the piston out using a screwdriver as leverage.
While you do so, make sure that you remove extra oil from the air chamber.
If the piston is fine, then simply clean it with a dry cloth or rag.
However, if it’s broken, then throw it out and use the replacement you have bought from the local store.
Make sure that you get the exact piston for your specific Bosch drill or else it will make things messy.
After removing the piston, you have to examine the O-ring in the next step as follows:
Step 4: Examining and Replacing the O-Ring
O-ring basically makes a tight vacuum seal, which allows the piston to build pressure. As a result, your drill starts hammering the surface.
Now if it gets defective, then the tool will not work ideally.
Hence, simply locate the O-ring and clean it with a dry cloth properly. If you notice a cut on the O-ring, you have to replace it with a new one.
Step 5: Reassembling the Drill:
After replacing the new piston, make sure that you pop in its arm using a screwdriver.
Similarly, refill the oil in the air chamber with fresh fuel as it will enhance the performance of your hammering drill.
Next, tighten all the screws carefully using a screwdriver.
Step 6: Check Your Drill on Different Surfaces
After assembling it, check your drill on different surfaces to see whether it’s hammering ideally or not.
You can try testing it out on hard surfaces, walls, and doors, etc.
What If it still Bosch Drill Hammer action not Working?
Well, in that case, you have to take it to a tool workshop and let the experts repair it for you,
This process will require money, but it will still be less than getting a new hammering drill.
Can I use a Hammer Drill as a Regular Drill?
You can use a hammer drill as a regular one with a small tweak. Find the hammer action button on the drill and turn it off. It will allow the drill to work as a typical one and it will not hammer while you make holes on different surfaces.
Final Takeaways:
Bosch hammering drill not hammering mostly happens when the drill’s piston, O-ring, or internal cylinder start malfunctioning.
You can easily replace these accessories in your drill by following the step-by-step guide we have mentioned above.
It will help the drill to start hammering again.
For a visual demonstration, you could follow this tutorial on YouTube as well:
