
The massive revolutionization in the use of lintel was witnessed after the disastrous destruction of the earthquake of October 2005 in Asia.
Since this tragedy, numerous researchers paid close attention to masonry construction and conducted various tests to determine the suitability of the masonry products.
Initially, they were used to give structural support and for their load-bearing purposes only, but nowadays they are being used to amplify the decorative ornamented value too. You might be wondering about “How to Drill into Lintel.”
But first, you must understand some fundamental facts in order to drill into it properly. With a heightened desire for impressions of the constructions, the aim is to enhance the stability of the buildings too.
For this purpose use of lintel beams has attained huge popularity in the construction industry. Whereas, a lintel beam is a horizontal unit placed over the openings of doors, windows, verandas, fireplaces, etc to support the load of the brick load and masonry work over it.
Aside from this, it can also be used as a decorative architectural element or a combined ornamented structural item.
First of all, Is it Safe to Drill into Lintel?
Well, drilling into any material weakens the integral strength of that material and the same is with the lintel. However, drilling small holes and using the correct ways would not affect the structural strength of the lintel to a greater extent.
Types of Lintels
Varied types of lintels are there, depending upon the design, location of the building, cost, and availability of the material. Some of the frequently used lintels are:
- Concrete Lintel
- Timber Lintel
- Stone Lintel
- Brick Lintel
- Steel Lintel
- Reinforced Concrete Lintel
- Reinforced Brick Lintel
To get a blind or curtain rail fixed into a window recess or in-wall, one gets in needs of drilling into the lintel. This job needs a skilled approach, to get a favourable outcome.
In that situation, certain measures must be taken to get desired results and minimize the chances of damage, as if it fails it may affect the integrity of the lintel.
These measures cover the part of getting prevented from injuries related to this work, like the use of protective, and also involve the selection of correct equipment.
Equipment – Drills and Drill Bits
● Drills
The cutting tools that are used to remove material and create holes are called drills. Certain features of the drill’s geometry that aid drill functions are:
Spiral: The rate of chip removal is controlled by a spiral.
Point Angle: It is an angle produced by the point of either the piece and the angle changes depending on the substance in which the bit will be used. Softer materials need to have a sharper angle, while a larger point is preferred for the harder materials.
Lip Angle: The lip angle calculates the quantity of support offered to the sharp end. The greater the lip angle is, the more aggressive the bit will be cutting.
Functional Length: The depth of the hole and resultant accuracy of the hole depend on the functional length of the drill.
● Drill Bits
Drill bits’ cutting tip geometry varies, based on the materials they need to drill in like wood, plastic, metal, concrete, ceramic tile, and porcelain.
Based on their cutting tip geometry, they are featured as; having sharply pointed spur in the centre in a wooden bit whereas the masonry bit has that are grounded to 135°. Various types of drill bits are:
- Twist Drill
- Counter Bore
- Flat Bottom Boring
- Counter Break
Among them, Twist bits are the most common type as it can drill in wood, plastic, and light metal.
Can You drill into a lintel?
Yes, the furnished result would need the use of correct equipment and the right methods.
- Choose the right drill and necessary tools.
- Correct positioning and right angle.
- Correct measurement of the screw, nail, or bolt.
- Marking with tape or adjustable stop according to the required depth.
- Reassessment and re-checking.
- Remove leftover debris before fixing it.
Tips:
- After marking, a pilot hole of 1/8th and 1/4th inches should be made as it will further guide the drill for the real hole.
- Work must be done in short bursts, instead of rushing.
- A battery-powered drill, as they do not have enough power.
- Avoid drilling into the damaged lintel.
If the pug is much thinner than the drilled hole, then use some wooden sticks around the plug to tighten it
Drilling into Lintels – Step-by-Step Process For
Some specific measures are listed for drilling into varied types of the lintels, like;
1- Drilling Timber Lintel
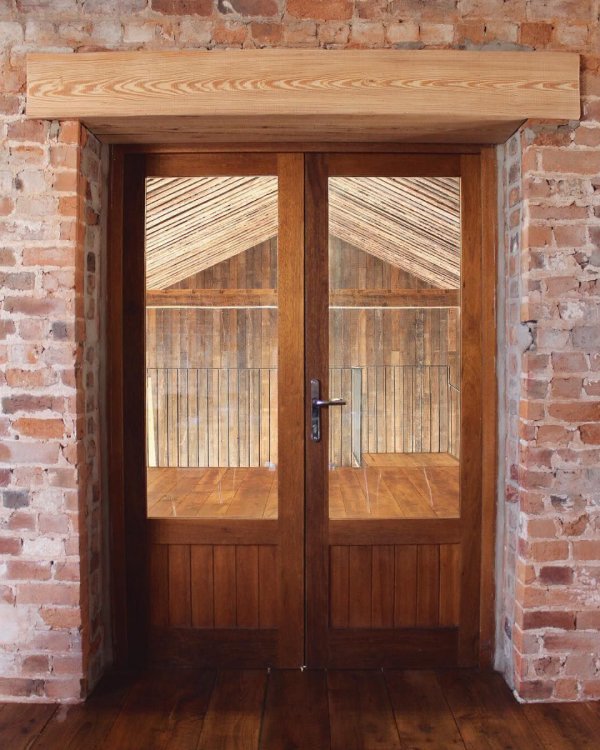
Timber lintel was used in past especially in hilly areas, due to its ease of availability and easier to drill, but now they are replaced due to their flammability and low durability.
Tools:
Standard cordless drill with standard bits.
Method:
- Highlight the point where you want to drill.
- Wrap tape around the spade to indicate the level of the hole.
- Begin slowly and gradually increase the speed once the bit has penetrated the timber.
- Apply only gentle pressure
2- Drilling Stone Lintel
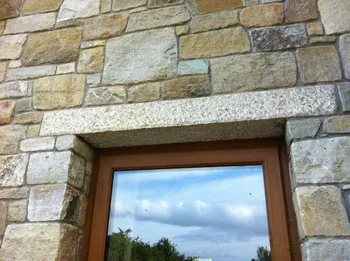
It is not used commonly, as it can only be used in buildings having stone masonry. Another reason for its reduced usage is its high cost and less availability.
Tools:
Drill with a hammer drill with a metal-bonded diamond power drill.
Method:
- Highlight the point where you want to drill.
- Mark the depth of the hole by wrapping tape on the bit
- Apply gentle and steady pressure.
Tips
- The drill bit should never appear extremely hot, so keep a quantity of water on hand for occasional lubrication.
- Exercise extreme caution since stone frames is tough to replicate once drilled.
If your drill bit becomes caught in the limestone, turn it off, reset it to spin counterclockwise, and then restart the drill; it will be unstuck.
3- Drilling Concrete Lintel
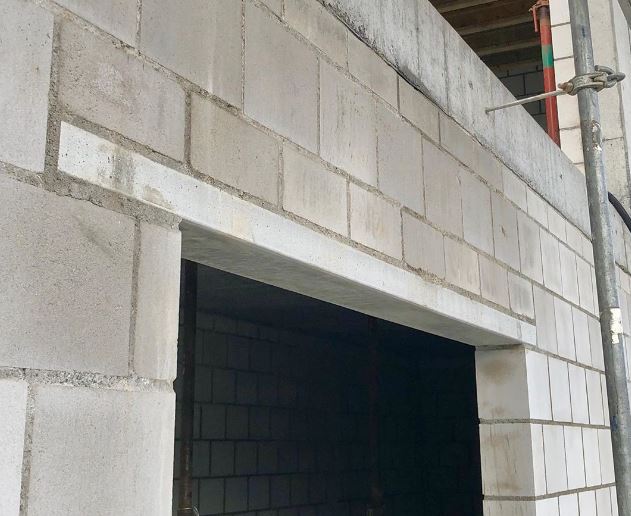
This category of lintels is most commonly used, due to its low cost and durable nature. There are two types of concrete lintels: (a) plain concrete lintel, which is used for small openings up to 1 meter in length, and (b) reinforced concrete lintel, which is used for bigger openings.
Tools:
A Hammer drill or SDS rotary is recommended. With that masonry drill bits (from the smallest size to High-Speed Steel – HSS), wall plugs, and screws.
Method:
- Highlight the point on concrete where you want to drill.
- Decide the depth and width of the hole based on the size of the wall plug.
- Start drilling a shallow hole, then speed up and engage the hammer features.
- Drill a pilot hole using a tiny bit.
- To eliminate debris, rewind the spade every 10 seconds.
Tips:
- Avoid heating the bit by using water.
- For harder patches, use a hammer with masonry nails to prevent damage to the instrument.
- Make sure to switch off the hammer feature, before drilling into the steel rod. Also, do not forget to use HSS drill bits while drilling into steel.
- Do not make the mistake of increasing the pressure as it will damage the tip of the instrument.
- Drill with moderate pressure with no increment in pressure, and let the drill do the work until the desired depth.
4- Steel Lintel Drilling

This category is reserved for heavy load-bearing and special cases, due to its high cost and large bearing capacity. Drilling in the teel is toughest as first one need to drill into the lintel and then into the teel.
Tools:
SDS rotary drill, paired with masonry and HSS drill bits. Aside from this, self-tapping screws are best to be used.
Method:
Once the concrete is hit by using the described steps, follow the following steps to drill into the steel.
• Turn off the hammer feature and switch to HSS drill bits.
Tips:
- Check that the drill bit is crisp.
- Do not rush and drill at a slow speed to avoid heating the instrument.
- Make sure to periodically lubricate the instrument by using multipurpose oil or specialized cutting oil to reduce the friction and heating up.
5- Drilling Brick Lintel
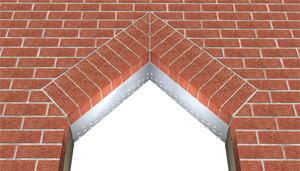
There are two types of brick lintels;
(a) Plain Brick Lintels- For small openings, up to 1 meter.
(b) Reinforced Brick Lintels – For openings larger than 1 meter and where heavy loads are to be lifted.
Tools:
- Hammer drill or SDS rotary drill, masonry drill bits.
- Tungsten carbide masonry drill bits are best to be used in drilling brick lintels.
Method:
- Highlight the point where you want to drill.
- Select the diameter based on the dimensions of the wall plug.
- Apply gentle pressure and start drilling in small bursts, without hammer function to form a shallow hole.
- Now, enable the hammer mechanism and begin applying more force.
Alternatives To Drilling In To Lintels
Patch of the timber can be glued to the wall, using industrial adhesives to fix the curtain or blinds into it.
Conclusion
So, by now you might be clear about how to drill into the lintel. Moreover, a horizontal beam is placed over the entrance and windows, to provide integral strength and structural support to the load of the brickwork and other structures above the openings, these beams are called a lintel.
Varying in strength, cost, and availability, there can be different types of the lintels like timber, concrete, steel, brick, etc. Also, drilling into the lintel can be avoided by using a timber patch adhered to the wall.
Frequently Asked Questions
How can you tell if a lintel is a concrete or steel?
Appearance is key in distinguishing between steel and concrete lintels. Concrete lintels, on the other hand, are greyish in colour.
Which bits set should I use for drilling into lintels?
SDS bits are usually considered best for drilling into lintels because they survive best in the case of tough lintels.