To be practical, DeWalt is the shining name in the field of Power Tools. Although the brand’s quality isn’t only restricted to cordless drills, rather we found them extremely superb for all drilling needs. Exploring deep in the DeWalt cordless drills, chuck is an important part without which you might not be able to perform perfect drilling.
In actuality, it holds the drill bit in place to accomplish drilling with perfection. But sometimes, the chuck becomes faulty.
But major problems are quite the same associated with chuck, which now also has many possible solutions.
Grounded in fact, most problems associated with DeWalt chuck result in its improper working. The chuck might get jammed or stuck.
Read with us to get the most appropriate answers to the problems associated with DeWalt Cordless Drill Chuck. Let’s begin!
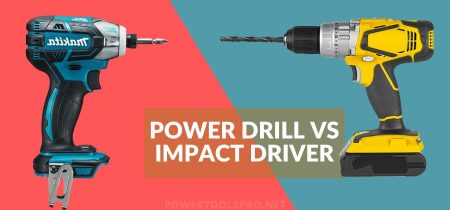
What is the Chuck on a Cordless Drill?
A chuck is a common tool that is used to hold the drill bit at a pace to perfectly accomplish any drilling needs. In actuality, it’s incorporated into the cordless drill to get radial symmetry while doing the drilling. They use jaws to firmly hold the workpiece.
You can tighten or loosen the jaws on the chuck by using a wrench-like device called a chuck key. But the keyless chucks can be tightened or loosened even without the chuck key, which is handy, though. In short, the chuck on cordless drill enables quicker and safest drilling operations.
Reasons Why Dewalt Cordless Drill Chuck Jammed?
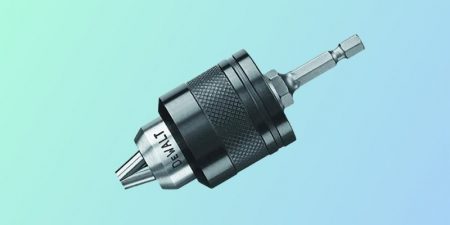
A chuck is a part that attaches to the end of a drill bit or similar tool to hold it in place. Dewalt cordless drill chuck stuck closed due to the surface friction and hard drilling.
The most obvious reason is the age of the drill. The chucks on older and less used drills become jammed. The other reason is the improper installation of the chuck. If you remain unable to rightly place the chuck, it won’t work perfectly.
How to Fix a Drill Chuck?
Rooted in, the drill chuck is incorporated to hold the drill bit in place with the help of firmly clamped jaws. But what if the drill chuck becomes seized open or closed? You must fix it as quickly as possible to continue with your project. Let’s discuss how to fix chucks in different situations.
- If the drill chuck gets seized closed, you can fix it by releasing the jaws with the help of channel lock pliers. You need to remove the drill bit before closing the chuck and then try to inspect the jaws for proper alignment. If the jaws aren’t at the exact place, you need to gently tap them in place with the help of a hammer to realign. In this way, you’ll get rid of seized closed chucks.
- On the other hand, if the chuck is stuck open, you need to check the tightness of the screw which lies inside the drill chuck. In actuality, the loosened screw can prevent the proper movement of the teeth. To sort out this problem, simply insert the compatible screwdriver in the drill chuck and tighten it as required. As this screw is reverse threaded, so turn it in a counterclockwise direction to make it fully tighten.
- Sometimes you can fix a faulty chuck by only replacing it. To do so, you have to use the screwdriver to get off the screws from the bottom.
How do you Free a Jammed DeWalt Drill Chuck?
On the moral high ground, the DeWalt drill chucks are incorporated for specific purposes to hold the drill in position and to prevent slipping. If the chuck becomes jammed on the DeWalt drill, go and check the chucks and gear cases to spot the error. Looks complicated? Don’t worry. We are going to explain how you can free a jammed DeWalt drill chuck without an expert.
- First of all, hold a screwdriver to remove the interior chuck screw. We find the T15 Torx screwdriver good for DeWalt drills. All you need to do is to loosen the chuck by turning it in the clockwise direction.
- If the drill chuck is badly jammed, you have to hit the drill with a hammer. But be gentle there. Also, hit the screwdriver with a hammer against the drill’s edges towards the pointy part.
- Now hold an Allen wrench, put it to the chuck and perfectly tighten it there. Then gently hammer the Allen wrench to remove the chuck. Remember to hit it from above as its reverse thread.
- Finally, remove the chuck from the drill and check for any damages or debris.
How do you Free a Stuck Keyless Chuck?
When it comes to keyless chucks, they often get stuck. So, you might feel difficulties disassembling it. Here, we are going to teach you how to do it effortlessly. You can consider the following steps to do the right trick.
- First of all, you need to retract the jaws into the chuck.
- Then loosen the screws in the clockwise direction.
- Hold an Allen wrench to fully tighten the short end into a drill chuck.
- Next, put the drill at the edge of the bench or table in such a way that the drill remains hanging in the air.
- Then hold it to the table and gently hammer the Allen wrench in a downward direction.
- Finally, you will get rid of the stuck keyless chuck.
How do you Unstick a DeWalt Drill Chuck?
When it comes to DeWalt drills, you can remove the chuck by going through the following steps.
- Firstly, check for the left-hand threaded screw, which is located inside the chuck’s bottom.
- After finding it place the chuck key into any one hole located on the right side in a way that the chuck faces you.
- Now hit the key in the clockwise direction with the help of a wooden mallet or like that object. This allows you to loosen the screw inside the chuck.
- Then fully open the jaws and insert the screwdriver into the chuck’s bottom to support the screw head. And then remove the screw by turning it in the clockwise direction as it’s a left-hand screw.
- Now it’s time to place the key into the hole located on the left side of the chuck. Same as before, you have to speedily strike the key in an anti-clockwise direction with the help of a wooden mallet or any other similar object.
- Finally, you will get a loosened chuck which can even be unscrewed by hand. And you’ll get rid of DeWalt Chuck stuck.
How do you Remove a Chuck that is Stuck?
Whether you’re a master carpenter or an occasional drill seeker, replacing the drill chuck isn’t an uncommon thing. But sometimes chuck got stuck in the drill, and you might find it hard to remove at this point. What to do to remove such chuck? Don’t worry. We are going to guide you in this regard. Here are some steps which you need to follow to get rid of stuck chuck!
- First of all, you have to remove the ring piler to take off the ring. This will help you to pop off the chuck collar with greater ease.
- Now position the drill chuck collar between different clam shells for support. Then align a punch on the chuck’s shaft and press it out. When you press the shaft, it will take the drill chuck with it, and the lower collar of the chuck will be left behind.
- Once you remove the collar, now it’s time to separate the drill chuck from its shaft. You need to flatten the shaft with the grinder and grinding wheel.
- In order to remove the chuck’s screw, the shaft must be placed into the vise. You need to flatten the shaft from at least two sides to accommodate the vise. Hold in there, don’t touch the shaft when it’s hot.
- Now it’s time to unscrew the chuck’s screw. As the chuck screw is reverse threaded, so you’re required to turn them in the drill’s forward direction.
- Further, hold a large Allen key and tighten it into the chuck.
- Finally, turn the Allen key to spin the chuck off the shaft.
How to Replace a Chuck in a Cordless Crill?
Sometimes, replacing the drill chuck remains the only option to bring the cordless drill back to life. To do so, firstly, insert the screwdriver into the chuck to remove the screws from the bottom. Then follow the following steps.
- Snug the chuck with the screwdriver and try to loosen it by turning it in the clockwise direction.
- Once you successfully loosen the screw, break the tightness of the chuck to get off the screw.
- After removing the screw, introduce an Allen key in the chuck and firmly tighten it.
- Now it’s time to insert the pipe over the Allen key to ensure leverage. You need to turn it clockwise to loosen the chuck. You can also do this by hitting the Allen key quickly with a hammer to loosen it.
- After losing the chuck, continue to remove it from the spindle.
- Then you need to insert the Allen key and try to tighten the chuck on the key.
- Next, use the key to tighten the drill chuck on your drill. Then loosen the drill chuck to remove the Allen key.
- Finally, insert the screwdriver inside the drill chuck to firmly place the chuck screw. Remember, use reversed thread for screwing.
How do you Replace the Chuck in a DeWalt Impact Driver?
For most of the time, you don’t need to replace the entire chuck on your DeWalt impact driver. But if the drill bit breaks inside the chuck, you must remove the chuck. Remember that DeWalt cordless drill chuck problems do not arise all of a sudden. You need to take proper measures of preventive maintenance to make it stop happening.
Moreover, you might also need to remove jammed or worn chuck. Although the process of replacing a chuck on an impact driver is quite tricky, we’re here to hold you back. Follow the following steps to get your job done within seconds.
Step#1: Take off the Retaining Ring
The very first thing you need to do is to get a small screwdriver and use it to locate any end of the retaining ring. Once you find it take it off from there.
Step#2: Disassemble the Chuck Assembly
Now it’s time to remove the chuck collar, spring, and flat washer. Remember, there exists a ball bearing in the anvil of an impact driver. Never attempt to remove this bearing, and be careful that it shouldn’t get loose. After removing the tension from the bearing, you have to tap the driver on the workbench. Here, you can remove any broken or damaged drill bit.
Step#4: Install new Chuck
After disassembling and removing the older chuck, now it’s the right time to install a new chuck. Grab the compatible chuck and start assembling it. To do so, you need to slide the collar into place and then add the flash washer and spring to accomplish this work.
Step#5: Install the Retaining Ring
To successfully install the screwdriver, you need to use the screwdriver for popping up one end of the retaining ring into place. Finally, use another screwdriver or your finger to finish installing the retaining ring.
How do I Release a Bit from a Jammed Keyless Drill Chuck?
Out in the open, most reversing drills incorporate a left-handed threaded screw placed at the bottom of the chuck. But what if your keyless drill chuck got jammed? You might not be able to release the bit as smoothly as you can do in a normal chuck. Now you need to follow the following steps to remove the bit from the jammed keyless drill chuck.
- At the start, you need to insert the screwdriver into the bottom of the chuck in a way that it becomes fit on the screw head. Now try to remove the screw by turning it in the clockwise direction.
- Then hold a larger Allen wrench, insert its short end to the chuck and tighten it. Next, sharply strike the long end of the wrench in a clockwise direction as it’s a standard right-hand thread.
- Finally, you will get a loosened keyless chuck which you can unscrew even with your hand.
Can you Replace a Keyless Chuck with A Keyed Chuck?
Replacing a keyless chuck with a keyed one can reduce the probability of Dewalt cordless drill chuck problems. The quick answer to this question is “YES” you can replace a keyless chuck with a keyed chuck. To be clear, keyless chucks are more advanced, and most people love to replace keyed chuck with a keyless chuck. If you need keyed chuck for certain applications, you can do it by going through the below-mentioned steps.
Step#1: Remove the Keyless Chuck
The start the process, you have to remove the keyless chuck. To do so, you need to go through the following steps.
- First of all, you need to take off the screw placed at the chuck’s center. Then you have to unfasten the jaws if chuck to the widest extent. Keyless chuck has a screw right at the chuck’s base. Remove it with the help of a screwdriver.
- Next, you need to grab the larger Allen wrench, insert into the chuck and tighten it until it’s firmly held there.
- Now it’s time to tap the Allen wrench with the help of a mallet and keep the direction counterclockwise while losing the chuck. Remember to apply light force at the start and then increase it if necessary.
- Once the chuck is loosened, you can unscrew it with your hand.
Step#2: Mount the Keyed Chuck
After removing the keyless chuck, now it’s time to install keyed chuck. To accomplish this process, you have to go through the following steps.
- Once you’ve decided to set up a new chuck, put some thread-locking greasy fluid on the screw and gently spread it.
- Next, you need to grab a keyed chuck and thread its base into the spindle.
- Then open the chuck, put in the Allen wrench, and tighten it with the hand.
- Finally, place the screw and firmly tighten it by moving in an anti-clockwise direction.
Conclusion
On the final note, DeWalt cordless drills have proved excellent to meet almost all drilling needs of their users. Unquestionably, their performance is unmatched, but replacing the drill parts has always been part of the game. When it comes to cordless drills, chuck is the most significant part, which is designed in a way to ensure perfection in drilling projects.
Many times, you have to face problems with the chuck, which might hinder the proper drill functioning. In actuality, most of the DeWalt cordless drill chuck problems are now widely addressed. After reading this guide, you must now be able to resolve almost all the chuck-related problems.
We explained everything from fixing an existing chuck to replacing it and everything in between. Read well before you deal with a faulty DeWalt Drill chuck!