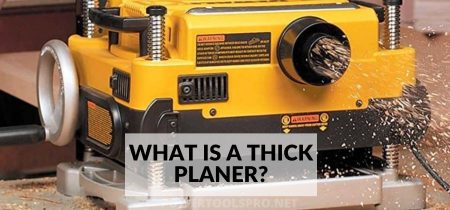
A thickness planer is a simple woodworking tool that produces a smooth surface on the face, edges, and ends of boards. It works by passing the board over a rotating cutting head that removes material to the desired thickness.
A thickness planer is an imperative tool in any carpenter’s tool box, and it’s important to select the right one for your needs.
In this article, we’ll look at the different types of thickness planers available and how to choose the right one for your workshop.
What is a Thickness Planer?
In woodworking, a thickness planer is a machine that smooth the surface of a board by shaving off thin pieces of material from its face.
It works in much the same way as a standard planer but can also handle boards that are thicker and/or wider than those that a standard planer can accommodate.
This also makes it an essential tool for any woodworker who needs plane boards with dimensions exceeding a standard model’s capabilities.
Furthermore, you can also use a thickness planer to flatten and smooth boards or wood panels. Apart from it, you can also utilize this machine to modify and adjust the wooden board’s thickness without any fuss.
By using a thickness planer, you can create consistent pieces of lumber that are flat and ready for use in your projects.
How to use a Thickness Planer?
If you’re a contractor, engineer, or woodworker, you know that having a thickness planer is essential for your trade.
A thickness planer allows you to easily adjust the thickness of your wood boards, which is important for creating furniture and other woodworking projects.
But if you’re new to using a thickness planer, or if you just need a refresher on how to use one, read on.
So whether you’re a beginner or an experienced user, read on for all the information you need to get started with your thickness planer.
Step One – Use The Right Thickness Planer
Thickness planers are a versatile tool that you can use for various woodworks. Besides this handy tool is also popular among woodworkers and craftsmen due to its compact size, smaller dimensions, and ease of usage. Because thickness planers are highly popular, you will find different planers in the market.
So before using a thickness planer, ensure that you are using the right planer as per your task. For example, if you want to work with household wood crafts and furnish boards around 10 inches, you need a 12-inch or 18-inch thickness planer as it will be more suitable for the job.
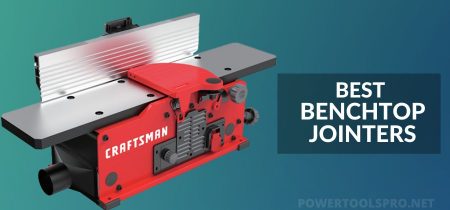
On the other hand, if you are looking for a professional, heavy-duty planer, we recommend using a bench top or free-standing thickness planer as they are more rugged and ideal for commercial uses.
Step 2 – Now Set Up the Tool
As mentioned above, these days thickness planers have become compact, and you can easily fit these tools in the coziest workshop.
After selecting the right thickness planer for your job, try to place it near an electric outlet so that its cord does not come in contact with the work area.
Similarly, we recommend plugging the equipment directly into an outlet as extension cords can get overheated, which may cause a serious fire hazard.
Furthermore, ensure that there is sufficient space above the planer. This space will allow you to feed lumber easily.
Lastly, we will advise you to keep all equipment and tool away from other appliances, plumbing fixtures, and pipes.
Ensure the planer’s base is secure to your working table or stand. This is to keep the tool stable and prevent tipping over while working.
Step 3 – Select the Material/Wood
Well, you can use a thickness planer for various purposes, but the primary purpose of a planer is to convert lumber into wooden planks.
When using a thickness planer, we recommend using products that are a minimum of 14 inches in length, and their width should be a minimum of ¾-inch wide.
Here you need to be careful about the limiting factor. The limiting factor in the board’s length can be defined as the distance on each side of the thickness planer.
Step 4 – Choose the Right depth, stop, and width
If you are planning on using a thickness planer to even out the thickness of your wood, it is important to first figure out the depth of your wood. You can effortlessly do this by measuring the wood’s thickness with a ruler or a tape measure.
Once you know the thickness, you can set the depth on your thickness planer to match it. Most thickness planers have a depth stop function that allows you to set the depth easily.
Once the depth is set, you can begin running your wood through the planer. The planer will remove any unevenness in the thickness of your wood, leaving you with a smooth, even surface.
The depth stop is an important safety feature on a wood planer. It prevents the tool from cutting deeper than the depth stop.
If you are not sure how to use the depth stop, it is best to set it on the very low end. This will help to prevent any accidental deep cuts.
Always use caution when operating a wood planer, and be sure to follow all safety instructions that come with the tool.
Step 5 – Feed the Tool
As you know that a thickness planer is a simple tool that you can use to plane the surfaces of boards and wood pieces.
To produce the desired final product, it is necessary to make several adjustments to the machine. First, the lumber must be planned on both sides to keep the moisture content uniform and prevent the wood from warping.
Next, the depth adjustment crank must be turned to the desired thickness. Finally, the power must be turned on and the table set to the correct height.
With these adjustments, the machine will operate as intended and produce a smooth, even surface on the wood.
Moreover, never run the tool when any kind of material is inside the feeder. You can set the material removal gauge between 1/32 to 1/8 inch to feed the lumber through the tool and to achieve the desired results.
Apart from it, always feed from the machine’s front end and don’t pull the wood from the back. Ensure that the board’s height remains even from all sides.
You can also wear safety glasses and ear protection while working, and if you have any breathing issues, use a safety mask to prevent sawdust.
Things to Avoid
Lastly, let’s quickly talk about the biggest mistakes that you need to avoid when using a thickness planer for wood:
- Don’t try to plane wood against the grain, or you will end up with tear-out wood.
- If you are planning a short wood piece, don’t attach it with another piece as it can damage your machine.
- Don’t try to plane more than 1/8-inch at one time, or it will tear out the board. Before planning any wood, read the manufacturer’s advice.
- Don’t put wood in the machine before turning it on.
Which Type of Planer Should I buy?
There are several factors to think about when purchasing a thickness planer. The most important factor is the type of wood you will be working with. If you only plan to work with softwoods, then a less powerful planer will suffice.
However, if you are working with both softwoods and hardwoods, you will need a more powerful machine that can handle the tougher woods.
Next vital thing to consider is the size of the boards you will work with. If you only plan to work with small boards, then a light-duty planer will do the trick.
However, if you regularly work with large boards, you will need a heavy-duty planer to handle the extra weight.
Finally, it also depends on your budget. Many high-end machines are on the market, but they come at a high price tag. If you are starting out, purchasing a less expensive model may be wise.
Which type of planner you should buy mainly depends on your specific needs and the task you want to fulfill. Below is the breakdown of various types of thickness planers for your convenience:
Manual planer
A manual planer is an ideal choice for smaller and household projects. These planers rely on your muscle power to scrape or shave the wood. As you power these, so there is no need to deal with trailing cords or batteries to charge the device.
In our opinion, it’s the best planer for common home projects such as window or picture frames. In a manual planer, the blade sits right at the planer’s edge instead of the middle. If you are new to woodworking, a manual planer is what you need in the beginning.
Apart from it, manual planers are available in a variety of sizes and designs. Hence you can easily get the one according to your specific needs and preferences. Besides, these planers are also the most simplest to use compared to the others; thus, beginners won’t have any issues while using them.
Lastly, no need to spend your time in setting up the unit as they don’t have any equipment with it. And this is the safest when it comes to price.
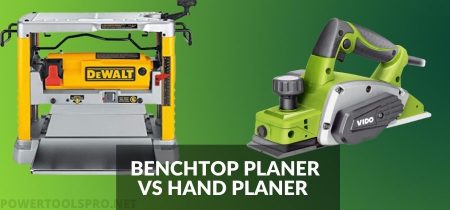
Handheld Electric planer
An electric planer is a simple planer that you can use to trim or remove smaller amounts of wood by shaving it off in various increments.
Usually, you will find two or three blades in these planers. The Handheld electric planer can remove around 1/8” in one pass without fuss.
Furthermore, electric planers are more suitable for harder and fewer minute tasks. A handheld electric planer is a powerful tool that can make woodworking more efficient and enjoyable.
It is the ideal tool for larger, heavier, or longer pieces of wood, and there are no limits to what it can shave.
With this powerful planer, you can quickly and easily remove excess wood from a piece, creating a smooth, even surface.
You can also use it to create delicate rabbets, dadoes, and other types of joints. In addition, the planer is great for removing scratches and dents from wood, leaving a smooth finish.
So, whether you are a professional wood crafter or a hobbyist, the handheld electric planer is a tool you will find yourself reaching for repeatedly.
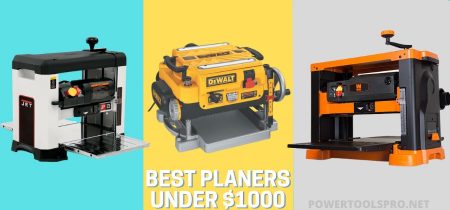
Benchtop Planer
Benchtop wood planers are a convenient tool for any woodworker, as they are small enough to be used on a workbench yet still provide the same level of performance as a larger floor model.
I have owned and used several of these planers over the years and can attest to their effectiveness.
In terms of price, benchtop planers are usually more affordable than their floor-model counterparts. This makes them an ideal option for budget-conscious woodworkers.
In terms of performance, benchtop planers can handle most jobs that a floor model can, although they may take some longer to complete.
Overall, benchtop wood planers are a great option for anyone needing a reliable and affordable thickness planer.
However, you need to know that the benchtop category is further classified into portable benchtop thickness planers (also known as “lunchbox planers”) and thickness planers. Both these are good performers, but they are not portable.
Furthermore, portable thickness planers can be carried to your work site, and you can also use them in your workshop.
What is the difference between a 500$ Planer and a $2000 Planer
A planer’s job is simply to make wood thinner. It doesn’t make wood flat. Well, it does to a small extent, but It matches one face to another. It won’t eliminate the cup or twist, it will just transfer the defect to another face.
As you go up you get one very noticeable thing some subtle things. More expensive planers give you larger capacity and a longer duty cycle.
As far as planers go, the more expensive ones handle wider wood, take off more in one pass (since they have more powerful motors), make less noise, and give you better flatness over longer spans of wood due to their longer beds. A lot of the expensive planers have helical heads, which reduces tear-out on figured or knotty woods.
- Expensive planers can plane wider boards
- Longer infeed/outfeed table: makes it easier to feed the wood in flat and avoids that dip you get at the end of the board
- Heavier design with less vibration: gives you a smoother surface
- Helical cutting heads: reduce tear out
Conclusion
So there you have it. The thickness planer is the perfect tool for taking a board that is too thick and shaving off small amounts of wood at a time until it’s the desired thickness. It’s an essential piece of equipment for any woodworker, so make sure you add one to your workshop arsenal.