Confused about the difference between a benchtop vs cabinet jointer? You’re not alone. A lot of people get tripped up by the terminology.
But don’t worry, we’re here to help. In a nutshell, a benchtop jointer is smaller and lighter than a cabinet jointer – making it perfect for smaller workshops or home woodshops. On the other hand, a cabinet jointer is larger and heavier – better suited for industrial settings.
If you’re still unsure which one is right for you, our team can help you make the right decision. We want to ensure you get the best machine for your needs – whether that means a benchtop or cabinet model. So read on to learn more.
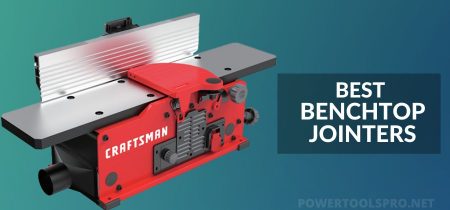
What is Benchtop Jointer?
If you’re the type of woodworker who takes pride in your work, you know that jointers are an absolute must-have in any well-equipped workshop.
Not only do they allow you to produce flat edges on rough boards before joining them edge to edge, but they also do it in a fraction of the time it would take to do it by hand.
In other words, a benchtop jointer is a real-time-saver, which we can all appreciate. So if you’re looking for a way to improve the quality and efficiency of your woodworking, a benchtop jointer is the way to go.
What is a Cabinet Jointer?
A cabinet jointer, also known as a standing jointer or cast iron floor jointer, is a woodworking tool used to create a flat surface on a piece of wood. It works by removing small pieces of wood from the edge of the board using a rotating blade.
The resulting surface is then much smoother and easier to work with. Compared with the standard jointer, Cabinet jointers offer many additional advantages, including more robustness, precision, stability, long-term working life, and other benefits.
However, they are also more expensive and require more space to operate. For those reasons, cabinet jointers are typically only found in professional woodworking shops. But it is a handy tool for those dealing with woodwork.
Furthermore, you will find many types of cabinet jointers on the market suitable for specific projects. Each of these types offers a different type of finishing as per the job’s nature. Below are the details of the types of cabinet jointers for your review.
Different Types of Cabinet Jointers:
Cabinet jointers come in all shapes and sizes. Some are big, some are small, and some are just plain weird. Here are a few of the most common types of cabinet jointers you’ll come across:
Closed-Stand Jointers
Perhaps, this is the most used jointer on the market today. Closed-stand jointers are available in various sizes, including 6, 8, 12, and 16 inches. Moreover, these jointers feature a sturdy and enclosed base that prevents the tool from dust and other similar elements. When it comes to noise and vibration while working, these are the best jointers available today.
Lastly, the enclosure makes them hefty while providing added stability and protection.
Open Stand Jointers
Open Stand jointers are the most affordable option. These jointers are lightweight; hence you can move and transport them easily. Besides, these are a bit noisier compared to the other types as their motor is not enclosed. This is why they are called open-stand. However, the lack of enclosure also makes these jointers risky.
Benchtop Jointers
In my opinion, the Benchtop jointer can be described as the baby variant of the popular table jointers mentioned. Besides, these resemble very much to the closed-stand jointers. These jointers are more suitable for stronger wood pieces and boards. However, if you are dealing with the larger boards, this might not be the best choice as their maximum cutting width is 6 inches.
Jointer or Planers Combo
While searching for the best cabinet jointer, you will come across a combination of jointers and planers. These tools feature a planer and jointer, making things easier and more convenient. A planer in the tool means you can easily trim the board as per specific dimensions while providing a flat surface.
Furthermore, you will find multiple types of these combos. The first is the over/under combination, whereas the other type is a side-by-side combination. More specifically, the over/under combination comes with one cutter and a table.
On the other hand, a side-by-side combination features a fixed jointer and a planer. Both these tools are placed side by side, and no need to buy the planer separately. This way, you can save hundreds of dollars and get the supreme functionality of a reliable cabinet jointer and a planer. Lastly, these combos are also handy if you have limited working space.
So, all these are the most common cabinet jointers available today; however, you might come across some other types as well, including:
- Flat Combination Jointers – comes in two sizes
- Acrylic Jointers – the newest type that you can get in four sizes.
- Brick Jointers – available in twelve sizes
- Bit-grapevine – Available in multiple shapes and sizes.
- Grapevine – comes in one size
- Barrel – only one size available.
- Exchangeable – available in four sizes.
- Commercial heavy-duty jointers – available in multiple sizes.
How to use a Benchtop Jointer
A benchtop jointer is a great tool for anyone who wants a perfectly flat edge on their workpieces. Here’s how to use one:
Set Up the benchtop jointer
As mentioned above, a benchtop jointer is a small and compact variant of a freestanding jointer. This tool is ideal for people who have a compact workspace.
When using the benchtop jointer, we will advise you to find a bulky benchtop jointer, or you can add weight to the tool. Most benchtop jointers don’t have screw holes that you can use to mount them onto your working table. In simple words, additional mass or weight will prevent you from accidental falls and slipping.
Furthermore, you can also consider the cast iron benchtop jointers as they are highly durable and weigh enough. Hence they will not slide or move while working.
When placing the jointer, find the proper place for your benchtop jointer. We recommend you find a level and sturdy surface at some height so you won’t have to lean or bend over while working. Similarly, ensure that there is enough clearance space while working.
Similarly, ensure sufficient space to the machine’s side as this will allow you to pass your boards safely and more easily over the cutter head.
Ensuring co-planer tables
While working with a benchtop jointer, ensure that the board’s faces remain flat and even. Apart from it, you need to ensure that the edges of your board remain square. To achieve this, you will have to set the jointer’s table height perfectly.
In most cases, we all want straight edges but keep in mind that it is determined whether your infeed and outfeed tables are parallel to one another or not. When setting up the table’s height, we will advise you to seek help from the product’s manual and make necessary adjustments if needed.
Square up the fence
The fence should be placed perpendicularly to the machine’s tables just behind the cutter head. Furthermore, it needs to be squared up.
Similarly, you need to adjust the fence’s angle. Ideally, it should be between 45° and 135°. This will also allow you to accommodate oddly shaped pieces and boards. Besides, squared-up and perpendicular fences also give sharp and clean edges.
However, squaring up the fence demand external tools. You can use several tools, but a digital angle gauge is perfect for getting square up the fences. However, there are many other tools that you can use for this purpose.
Set the cutting depth
If you use a benchtop jointer, it’s important to know how to set the depth of the cut. While using the tool, ensure that your passes go over the cutter head and give you noticeable progress.
However, be careful as you can go too deep with every pass. If your cuts are too deep, they can overload the jointer’s motor and potentially damage the tool or board.
So how do you find the perfect depth? It’s all about trial and error. Start with a shallow depth and gradually increase it until you find the right setting for your project. And, of course, if you ever have any doubts, it’s always best to err on the side of caution.
In our opinion, cutting depth should be at 1/32-inch increments as it produces sharp flatness.
Face-Jointing
Using a benchtop jointer is not that difficult, but the process demands focus. So, before squaring up the edges, you must ensure that the faces remain perfectly flat.
To do that, run the board, face-side down, over the cutter head after adequately adjusting the depth. If needed, do the same again to ensure that the face panel remains flat.
Edge-Jointing
After getting the perfectly flat faces of the board, square up its edges. This means you will have to push the board’s flat side against the fence.
Gently, push the board forward against the fence and press it down a bit so that it comes in contact with the cutter head. Follow the same process for at least twice to get sharp and flawless edges.
Tips for using Benchtop Jointer safely
If you’re looking to get the most out of your lumber, a benchtop jointer is a great tool in your arsenal. But if you’ve never used one before, it can be a little daunting. Here are some handy tips to get started.
Defining the grain’s direction
Remember, the direction in which you run the grain can affect the finishing. In some cases, grain’s direction can turn your project into a complete disaster. However, it depends on some factors, including wood species, the cutterhead’s knife sharpness, and the feed rate.
Furthermore, if you hear the ranting sounds from the cutter head or often experience more wear and tear, you will have to set the board’s orientation.
The general rule is to feed the board in the grain’s direction – from left to right. Holding the board with your left hand, and push it with the right hand
Use your left hand to hold the board when it passes over the cutter head. You will notice a bump when the board passes through the infeed table over the jointer and then to the outfeed table.
Here we recommend you to hold firmly and keep it stable while passing the board from these tables.
Furthermore, push the board with your right hand.
Here it is vital to ensure that there are no stutters, especially when feeding the board, as it can eliminate or remove too much material in one go. You can also take help from a push block if you are not comfortable and sound while working with your bare hand.
Removing a crook
A crook, in simple words, can be defined as an arc-like defect that you will mostly see in the board’s shape.
When a crook happens, you will see one side of your board is completely flat, whereas the other side will look like an arc. You will be shocked to know that, in this case, a benchtop jointer cannot flatten the affected side.
To resolve the crook, you will need other tools, including a band saw, a circular saw, or a miter saw. You can use any of these tools to remove these defects. Lastly, remember a benchtop jointer cannot fix parallelism issues.
Benchtop vs. Cabinet Jointer – Main differences
When it’s about woodworking, using adequate tools as per your task is essential. That’s why, if you’re stuck trying to decide between a benchtop jointer and a cabinet jointer, it’s important to know that upgrading to a cabinet jointer is likely to be a wise investment.
Power
Cabinet jointers are generally more rugged and accurate than their benchtop counterparts and tend to be quieter and heavier. Plus, they provide more torque and can handle more capacity, making them ideal for experienced woodworkers who are ready to take their jointing skills to the next level.
Ease of use
In general, benchtop jointers are more suitable for beginners than cabinet jointers. The main reason for this is that benchtop jointers are less expensive and easier to use.
Additionally, benchtop jointers are smaller and lighter, making them more manageable for beginner woodworkers.
However, cabinet jointers have their advantages as well. Cabinet jointers are more powerful and are suitable for larger projects.
Noise Level
Benchtop jointers are typically a bit noisier than cabinet jointers. A cabinet jointer might be a better choice if you’re looking for a quiet machine. However, benchtop jointers are usually more affordable, and you can store them easily when not in use.
Accuracy
If you’re looking for a stable, reliable jointer, then a cabinet jointer is the way to go. These jointers are larger and heavier than their benchtop counterparts, meaning they’re less likely to vibrate when in use.
This makes them ideal for anyone who wants to upgrade their workshop without dealing with the increased noise and vibrations that come with a smaller jointer.
Besides, cabinet jointers also have larger cutting capacities and longer beds, meaning you can take on bigger projects without worrying about the machine being up to the task.
Capacity
A standing or cabinet jointer is a powerful tool that can make quick work of even the most stubborn pieces of wood. Unlike a benchtop jointer, a standing jointer is designed to be used on larger pieces of lumber.
As a result, it can handle more tough cuts and is less likely to bog down. In addition, a standing jointer is also more powerful, making it ideal for use on thicker pieces of lumber.
In short, a standing jointer is a perfect tool for anyone who needs to cut through wood quickly and easily
Reliability
Generally speaking, both these jointers are efficient and work well. However, the difference comes in the tool’s durability and working. Benchtop jointers are smaller and more affordable, but they’re not as durable as their standing counterparts.
On the other hand, most cabinet jointers feature cast iron material, ensuring a longer working life. However, these are also expensive but worth the investment.
Conclusion
So there you have it. The end of the battle about benchtop jointer vs. cabinet jointer. Who will emerge victorious? It mainly depends on how you plan to use it and your particular task.
We hope we’ve helped clear up some of the differences between these two types of jointers and give you a better idea of which one might be right for you.
As always, reach out to us if any confusion. We love to help you.